Knowing your batteries - Part 5, Monitoring and Maintenance
by Larry Janke on 27 Dec 2009
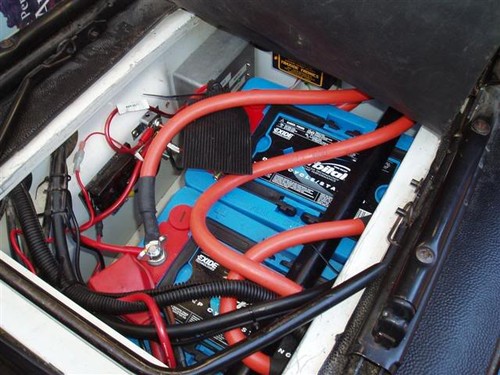
Getting to know your batteries SW
This is Part 5 of a multipart series by http://www.semarine.com/store/home.php!Larry_Janke from Southeast Marine Services. This week he talks about Battery Monitoring and Maintenance
To ensure longest life and satisfactory performance from your batteries, it is necessary to know what is going on inside them. As a minimum, it is necessary to determine general condition and state of charge. It is further advantageous to know rate of charge, charging voltages, rate of discharge and temperature.
Although the chemistry of all lead acid batteries is the same, the amount of monitoring and maintenance varies with the type of battery media i.e. Flooded, AGM or gel. Because monitoring of sealed batteries is limited, this paper addresses primarily flooded types and includes the sealed battery information where appropriate.
Flooded batteries provide the maximum number of parameters for determining the above conditions. Sealed lead acid and solid media batteries such as absorbed glass mat (AGM) and gels, only allow us to indirectly measure some of them.
General Condition:
As a beginning, after a complete charge cycle, visually inspect the battery case, for cracks or electrolyte leakage. Closely inspect the connections between the cables and terminals. Most battery manufacturers recommend torque specifications for cable to terminal connections. Although you should check with the manufacturer of your batteries, a setting of 25 foot pounds is typical.
Clean the tops of the batteries and the terminals with a solution of household baking soda and water [100grams/liter or four oz. (8 tablespoons) per pint], rinse with clean water. Be sure the soda solution does not get into the cells.
Inspect the cables themselves for corrosion and cracked or burned insulation. A mixture of 50% motor oil, 50% linseed oil and some soda, painted on the terminals will inhibit further corrosion.
The terminals should be covered with insulating material to prevent accidental connection or grounding. Cable boots are available for this purpose, or you can make your own from a 3-4 inch square of inner-tube rubber and wire ties.
Although more of a design issue, battery to cable connections have a marked influence on maintenance and performance. Battery terminals are not bus bars or junction boxes. From the positive battery terminal, a single cable of sufficient size to carry the total loads which could be placed on the battery should go to a class T fuse with a value of 150% of total anticipated loads. A spare fuse should be kept nearby.
Class T fuses are specified because of the speed at which they react to break the circuit and for the further reason that once they open they do not arc across maintaining a partial circuit as some fuses do. Do not use household type cartridge fuses.
The fuse holder should also be covered with a non-conducting cover, most come with one. The fuse should be placed as close as possible to the battery - in any case not more than 12' less is better.
From the fuse the cable is continued to a bus bar of sufficient amperage rating, which should also be covered and each branch circuit is connected to the bus bar. Each branch circuit should then be fused within 7 'of the bus bar with a fuse of value 125% of the maximum anticipated load on that circuit.
For circuits up to 30 amps, a multiple fuse block can be purchased which uses the familiar and convenient ATO or ATC blade type fuses. All cable to terminal connections should be covered with heat shrink tubing. The negative battery cable can run directly to a common ground bus bar of the same capacity as the positive, and all negative circuits should attach there.
All battery interconnecting cables, that is, those which connect the batteries in series or parallel should be the same length to assure even charging and discharging.
Specific Gravity
Hydrometer readings must be adjusted for temperature, hydrometers are available with a built in thermometer for easy correction.
Next check the electrolyte level in each cell, if the batteries are in a difficult place, hold a mirror over the cell and direct a flashlight at the mirror to enable you to see into the cell, some adjustment of the angle will be necessary. Now check the specific gravity of each cell, if there is not room for the hydrometer, a sufficient sample of electrolyte can be withdrawn from each cell in sequence and placed in a glass container and read from there.
Hold the hydrometer vertically, draw up a sufficient amount of electrolyte, but not so much as to allow the float to bump into the top of the syringe and read the float at eye level where the curve in the electrolyte crosses the scale. Hydrometers come in all sizes and prices. Forget the ones that have little floating balls or a pointer that swings. What you need to make this disagreeable task a little less so is a certified syringe bulb type hydrometer of sufficient length to allow easy reading of the values on the float.
These hydrometers are not inexpensive and usually difficult to find but do make the job a lot easier. An even easier to use tool is the optical refractometer. All it takes is one drop of electrolyte, a light source and some distilled water for clean up.
Although formerly expensive, a refractometer can be purchased for under $100.00 not much more than a quality hydrometer. They are more portable, safer and less messy to use and if you drop it will probably survive, which the hydrometer usually doesn’t.
For flooded batteries, which are preferable in cycling service the addition of a hydrometer or refractometer to our tool box gives us the most complete information available. The following table repeated illustrates battery condition in percentages of full charge as expressed by specific gravity at 78 F.
Specific Gravity versus charge at 78F.*
100% 1.265-1.275
75% 1.225-1.235
50% 1.190-1.200
25% 1.155-1.165
0% 1.120-1.130
* Specific gravity cannot be checked on gel ,AGM or sealed batteries
ADD 0.004 FOR EACH 10 DEGREES ABOVE 78 F.
SUBTRACT 0.004 FOR EACH 10 DEGREES BELOW 78 F.
EXAMPLE: 88F. SG=1.275+.004 ACTUAL SG =1.279
SG + 0.84 = Cell voltage. Example 1.265 + 0.84 = 2.107 x 6 (x number of cells)
Example 2.107 x 6 = 12.642 volts
Specific Gravity readings should be taken at least every three months and recorded in a log. With a new set of batteries, they should be fully charged and the Specific Gravity reading for each cell should be logged. Subsequent readings will help determine the health of the battery and serve as a warning of incipient failure of an individual cell.
Since all battery cells are not created equal, do not expect each cell in a bank of new batteries to give identical specific gravity readings. They should be close but can be a few thousandths apart without cause for alarm. After several charge/discharge cycles, they will usually come closer together. What is important however is to record these baseline values to use for comparison purposes in the future
Voltage
Specific gravity reading is an unpleasant and time consuming business and certainly not one that will be done every day, so how do you ascertain the state of your batteries in a more convenient manner? Although not as accurate as specific gravity readings, voltage can be a reasonable guide to battery condition.
Open circuit (no load) voltage versus charge **
100% 12.7 VOLTS /25.4 VOLTS
75% 12.5 VOLTS/ 25 VOLTS
50% 12.2 VOLTS/ 24.2 VOLTS
25% 11.9 VOLTS /23.8 VOLTS
0% 11.6 VOLTS /23.2 VOLTS
Ideally the above values are taken from a battery which has been at rest with no charge or load on it for 12 hours, but as a practical matter with a 5-10 amp load on the bank, a reading of 12.0 volts (or 24 volts) indicates that the system is approaching 50% discharge and should be recharged. Do not worry if short duration heavy discharge loads such as inverters pull the voltage below these values. The voltage will rise again when the load is removed.
As you can see from the above table, in a 12 volt system there is not a wide range between full charge and complete discharge. To measure this narrow difference, accurate measuring devices are necessary.
Analog volt meters, the kind with a needle on them, are not at all sufficiently accurate to meet the specifications and neither are a lot of digital meters. To accurately measure to the required tenth of a volt, the meter must read to a hundredth of a volt .01, although it does not need to display the hundredth. The reason for this is that the last digit will 'dither' between the limits of accuracy of the meter.
If the meter has a typical accuracy of plus or minus 3% of reading plus 1 count, and only reads to a tenth of a volt the reading can be off, (plus or minus 3% of 13 volts = 0.39 volts plus 1 count gives a variance plus or minus 0.49 volts, or almost half a volt.) . Now, let’s say the batteries are actually at 12.5 volts but the meter could display any value between 12.0 and 13.0 volts. Now you have no idea whether the battery is fully charged or fully discharged. So be certain that your volt meter will read as required.
The very reasonably priced 12 EXB meters from Shoreline Electronics actually read to .001 volt (one thousandth of a volt) and display to that accuracy in an expanded scale mode, they are also backlit by the push of a button and have a built in alarm which warns when battery voltage reaches a preset level. Another feature is a maximum voltage reading which allows a determination of the maximum voltage reached during a charge cycle. This information allows you to determine whether or not your charging system is reaching the voltages specified by the battery manufacturer.
For sealed lead acid, AGM and gel cell batteries, since you can’t determine their specific gravity, voltage is the only way to have any idea as to their condition. If voltage begins to drop more rapidly with a given load, you have an indication that something is amiss and battery failure may be in the near future. The ability to monitor maximum voltage and float voltage is even more important as these type batteries are far less voltage tolerant than flooded types. Since AGM batteries are susceptible to the damaging and dangerous phenomena of thermal runaway voltage monitoring is even more important.
Amperage:
An accurate amp meter is also a helpful tool in determining what is going on in your system. Knowing what individual appliances or circuits draw helps establish a battery capacity budget preventing over discharge and accelerated battery failure. Although accuracy is not as important as in a volt meter it is beneficial to be able to read both current draw and charge rate.
Again the Shoreline digital 200 AB ammeter which measures up to 200 amps with an accuracy of.01amp, and has the same lighting and max hold features of the volt meter is a very handy addition to our battery monitoring tools.
Utilizing a Hall Effect transducer, a device which measures deflection in a magnetic field caused by current passing through it, very little power is used to operate the meter, much less than a shunt type and far broader current range is possible. The Hall sensor is merely placed over the negative battery cable, no cable cutting is necessary. There is even a split model so you don’t even have to disconnect the cable from the battery. Depending upon which direction the cable passes through the sensor the meter will read positive during charge and negative during discharge or vice-versa.
One of the real advantages of the ammeter is determination of charge current. For example, since alternator output will vary with RPM, the preferred engine speed to provide the desired charge rate is easily determined. If you are sitting on a hook, running your engine to recharge your batteries, now you can determine the most efficient RPM.
On my own boat I utilize multiple Hall effect sensors selected with a rotary switch and one meter to monitor multiple functions such as wind generator, two alternators, solar panels, AC powered charger output and inverter draw. Now I know what my refrigerator really draws or my wind generator solar panels or other charging device are contributing, not just what the manufacturer tells me they should.
What about so called Amp Hour Meters? These devices are expensive and not terribly useful. Although the idea is good, they don’t take into account a lot of factors, such as individual cell specific gravity, temperature, age and plate density. They are really just an averaging counter which is arbitrarily set to a given value in amp hours.
When the battery is new this setting is helpful but still doesn’t take into consideration the other factors noted above. As the battery ages, its capacity diminishes and since we don’t have a simple method to ascertain falling capacity the measuring device is still assuming full capacity.
If the meter is installed on a set of batteries which have been in service for a while, who knows where we are starting. Although it is possible in the laboratory to ascertain remaining capacity to some degree it is virtually impossible to accurately do it in the field.
An accurate volt meter and a little knowledge as to how batteries function, is a much less expensive and more accurate method of determining battery condition!
Equalization:
Equalization is the process whereby individual cells are forced to similar specific gravity values. Equalization is usually thought of as a periodic process where batteries are subjected to a higher than normal voltage usually about 15.5/ (31) volts at a limited current for a predetermined length of time. Temperature must be kept below 120 F.
This system will raise cell specific gravity in the least amount of time but is also the most injurious to the battery as a whole. Some cells will be overcharged to allow those lagging behind to catch up. Also the batteries should be isolated from the loads during the process as the higher voltage can damage or destroy lighting and electronic appliances, meaning you have to shut off everything in the boat.
When should equalization be performed? When individual cell specific gravity varies by .015 or when performance seems to be dropping off. In the latter case, if equalization does not restore the specific gravity to similar levels, then battery replacement is near.
If you live aboard or are cruising and are cycling the system to near capacity (50%) on a regular basis, another way to equalize batteries is every 30 days, subject the batteries to a long enough charge at a lower voltage, say 14.4 -14.6 (28.8-29.2) volts to fully raise specific gravity. If the batteries have been at float voltage for an extended period (3 months or more) the electrolyte will stratify, the more concentrated sinking to the bottom, a short equalization will mix the electrolyte and bring the cells back in line.
Equalization is where the baseline specific gravity values discussed above come into play. Even though we may not be able to achieve identical specific gravity on all cells, we can approach the baseline values as closely as the battery age and condition will allow.
Since it is not always desirable or possible to perform a complete recharge every day, it is acceptable to recharge the system to say 80% of capacity and then once every 30 days do a complete recharge or lower voltage equalization.
Alternators assuming appropriate regulators which allow adequate time at voltage are especially good for this as they typically operate at voltages which obtain best charging with the least stress on the battery. A few high quality AC powered chargers will also accomplish the desired complete charge.
Sealed batteries, AGM and gels should never be subjected to high voltage equalization, damaging and dangerous consequences may occur ( For a detailed procedure for setting charging and equalization voltages and duration see the next part of this series)
Water Loss and Self-Discharge:
In addition to the above equipment, hydrometers, meters, etc. another very useful addition to the flooded battery maintenance scene are Catalytic recombining caps such as the Recombinator+ manufactured by Surrette Battery Co. of Springhill Nova Scotia and the Hydrocap.
Manufactured by the Hydrocap Corporation in Miami Florida these replacement caps for the batteries cell greatly reduces battery maintenance. As a battery approaches full charge, the available charge current that the battery will no longer accept disassociates the water in the electrolyte (1.265 SG electrolyte is 2/3 water) into elemental hydrogen and oxygen gas.
These are the bubbles which make the electrolyte appear to be boiling although much higher temperature than our allowable 120 F. would be required to actually boil it. The gasses when combined used to be water. The catalytic caps recombine the hydrogen and oxygen back to pure water and return it to the cell. In most cases watering is reduced to once or twice a year.
Another benefit is retention of solid electrolyte. As the bubbles escape into the atmosphere, they carry with them liquid electrolyte on their outer surface. When the bubble collapses the liquid electrolyte is deposited on the top of the battery. In addition to being messy, this accelerates self discharge.
Flooded, lead antimony grid plate batteries will self discharge at a rate of about 1% of capacity per day. If the top of the battery is wet with electrolyte, conductivity is increased and self discharge is increased requiring more frequent charging or higher float current levels.
Although the accumulation of hydrogen to a level sufficient to cause explosion is rare due to it’s minimal density ( it wants to go up and away) the subsequent reduction of the level of hydrogen gas to a concentration well below that required for ignition is a desirable safety measure.
In summary, an understanding of how batteries work, and what is needed to keep them in top operating condition to insure their best and longest performance and a few pieces of equipment will go a long way to making living with your batteries more pleasant. Not to mention adding a long time till you have to wrestle them out of the bilge again.
To read the previous Parts of this article click below:
http://www.sail-world.com/Cruising/Knowing-your-battery,-Part-1---10-common-battery-myths/63451!Part_1
http://www.sail-world.com/Cruising/Knowing-your-Batteries---Part-2/63700!Part_2
http://www.sail-world.com/Cruising/Knowing-your-batteries---Part-3,-Why-fewer-bigger-is-better/64165!Part_3
http://www.sail-world.com/Cruising/Knowing-your-batteries---Part-4,-Some-battery-charging-guidelines/64379!Part_4
To make inquiries to South East Marine Services or learn more about them, click http://www.semarine.com/store/home.php!here.
If you want to link to this article then please use this URL: www.sail-world.com/64806