
Epoxy basics guide from Wessex Resins & Adhesives
by Epoxycraft 11 Mar 2020 17:00 GMT
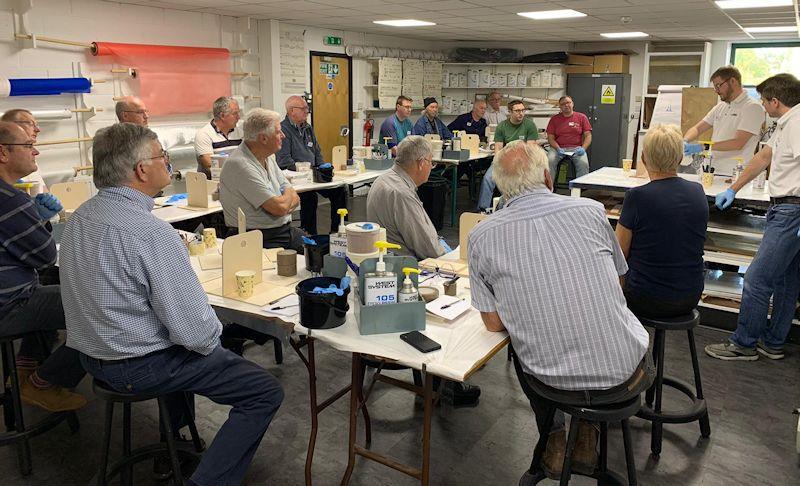
Teaching epoxy basics © Wessex Resins & Adhesives
Epoxy's Cure Stages
What is the difference between working time, pot life and cure time? All three are slightly different.
Working time, also called open time, is the amount of time epoxy remains liquid between when you mix the resin and hardener and when it begins to gel. During working time, the epoxy remains workable enough to wet out a surface. All assembly and clamping should take place during the working time to ensure a dependable bond.
Pot life is measured with a confined mass of 100 grams of epoxy (4 fluid ounces). The resin and hardener are mixed for two minutes, then timed until the epoxy starts to gel. This provides a good idea of how long the epoxy will stay liquid in a mixing container.
Initial cure indicates the amount of time before a thin film or coating of curing epoxy can be handled.
Here is how 105 Resin with 205 Fast Hardener behaves at 72 degreesF (22 degreesC):
- Pot life 100 grams: 9-12 minutes
- Working Time: 60-70 minutes
- Initial cure to solid in thin film: 6-8 hours
Controlling cure time
The easiest way to control cure time is to choose the hardener with cure speed that is a good match for your project and working temperatures. WEST SYSTEM 205 Fast Hardener has a shorter working time while 206 Slow Hardener and 207 Special Clear Hardener have similar, longer working times. 209 Extra Slow Hardener is the slowest hardener and is best suited when lengthy working times are needed, or when you're working at very high temperatures. Beyond this basic approach, there are a few other steps for controlling cure time.
Keep your ambient working temperature ranges in mind when selecting the hardener for your application. Each hardener has an ideal temperature range. You'll find this listed on the hardener container.
The exothermic reaction of resin and hardener generates heat. To maximise your working time, don't leave the epoxy in a confined mass, such as the mixing pot. Pour the epoxy into a roller pan, or work with small batches.
When working on a large project, I separately pre-measure multiple small batches of the proper amount of resin and hardener ahead of time. As I'm working, when I need another fresh batch of epoxy, I can mix it together quickly and continue working. This saves time while I'm applying the epoxy and ensures an accurate mix ratio. You'll waste less epoxy by creating multiple small batches rather than one large batch that may kick off (start curing) before you're finished using it. No-one likes to see a pot of unused epoxy smoking in its container.
Temperature affects cure speed. You can accelerate epoxy cure by increasing the temperature. The 10-degree rule is that every 10 degreesC increase above 22 degreesC cuts cure time in half. If you need to speed the cure process, after the epoxy cures to a gel state, increase the temperature surrounding the epoxy up to 45 degreesC. Don't start this process before the epoxy reaches a gel state because the epoxy coating may run or sag on vertical surfaces.
Dispensing and mixing
It is critical that you dispense epoxy resin and hardener at the correct ratio. Altering the amount of hardener does not control cure speed. Instead, it creates an epoxy mixture that can never fully cure and will have greatly reduced physical properties.
Epoxy can be accurately metered by volume or weight. Mix ratio information is on the hardener label and on the product's technical data sheets.
The 301 (5:1) and 303 (3:1) Mini Pumps are hard to beat for the price when metering small amounts of epoxy. One full pump stroke resin to one full pump stroke of hardener delivers the correct ratio. One pump stroke of each will total around 24 grams of epoxy. Depress each pump head fully then allow it to rise to the top before beginning the next stroke. When not using pumps, you can measure by weight (digital kitchen scales are very accurate, although please note that 207 Hardener has a different ratio by weight, to that of volume).
When mixing, stir the epoxy for at least two minutes to ensure it is thoroughly blended.
Proper mixing cannot be stressed too robustly as even with the correct ratios, inadequate mixing will yield poor results. We suggest counting to 120 while looking for a homogenous mix.
In cooler temperatures you will need to mix the epoxy longer. Scrape the sides, bottom, and inside corners of the container when mixing to ensure thorough blending.
Read more about exact mixing ratios.
Adding Fillers
If you need a thicker epoxy mix, add a filler. Add enough filler to achieve your desired consistency but be aware that adding fillers could affect the epoxy's cured physical properties. Be sure to mix the resin and hardener together before adding filler.
Check out this excellent advice article about adding fillers.
WEST SYSTEM fillers fall into two categories: high-density and low-density.
High-density fillers
403 Microfibers - Primarily cotton flock, 403 is great for quickly thickening the epoxy. Use it for structural wood bonding applications. When mixed into the epoxy it is grainy, like oatmeal. Cures to an off-white colour.
404 High-Density - A high-strength fibrous mineral, 404 will have the least effect on physical properties when mixed into the epoxy. It's a great option for fastener bonding applications and when the epoxy's highest strength needs to be maintained.
405 Filleting Blend - A blend of walnut shell flour, 405 turns epoxy dark brown. It's excellent for gluing joints and creating fillets on wood that will be naturally-finished.
406 Colloidal Silica - A fumed amorphous silica, 406 does not contain crystalline silica. It is an epoxy thickener that is perfect for structural bonding applications. If enough 406 is added, it can thicken epoxy to a smooth consistency similar to gel toothpaste. It cures to an off-white colour.
406 Colloidal Silica is the most versatile filler. Epoxy thickened with this filler can be tinted with additives. Many woodworkers used it to thicken epoxy to a mayonnaise consistency, then add sanding dust from the wood piece to colour-match the wood.
Low-density fillers
WEST SYSTEM offers two low-density fillers which make the epoxy easier to sand. When you need to do cosmetic work and surface fairing, use a low-density filler.
407 Low-Density - Primarily low-density hollow plastic spheres generically known as micro-balloons, 407 creates fairing putties that are easy to sand or carve. Cures to dark red/brown.
410 Microlight - These low-density plastic spheres are 30% easier to sand than epoxy thickened with 407 Low-Density filler. When 410 is added to the epoxy mix, the physical properties are reduced. While very easy to sand, 410 isn't the best option for use under dark finishes that will get hot in the sunshine, possibly contributing to softening. That is where 407 Low-Density is a better option. Cures to a light tan colour.
Read more about mixing fillers.
Surface preparation
When you are ready to apply the epoxy, make sure your substrate is properly prepared. For most substrates like wood, fibreglass, and metals the recommendation is sanding the surface scrupulously with 80-grit aluminium oxide sandpaper. Avoid solvent wipes to prevent contaminating the surface. If you need to use a solvent to remove any surface contaminants, make sure to apply it with plain white paper towels. Wipe the solvent on the surface to remove contaminants, then dry the surface right away with paper towels before the solvent flashes away (evaporates). Paper towels are a safe option to reduce the chance of contaminating the surface when doing a solvent wipe. Common solvents used are acetone and lacquer thinner.
Bonding
Once your surfaces are prepared properly, it is good practice to do a two-step bonding technique. First, apply a thin coat of unthickened epoxy on all bonding surfaces, then thicken the epoxy with a high-density filler to a mayonnaise consistency and apply it to one side of the joint. When properly mated, you should see some epoxy squeeze out of the joint.
Applying fibre reinforcement
There are a couple of different methods of wetting out fibre reinforcement such as fibreglass.
The dry method is for lightweight fabrics, up to 200g/m2. The fibre reinforcement is applied to the substrate dry, and then the epoxy can be applied on top to saturate the fabric. A WEST SYSTEM 800 Roller Cover works well to roll the wet epoxy onto the dry fabric. A WEST SYSTEM 808 plastic spreader/squeegee is also a nice tool to help move the epoxy over the surface, saturating the fabric.
The wet method is best for heavier reinforcing fabrics. Begin by wetting the substrate with epoxy, then laying the fabric over the surface. Use a plastic spreader to force the fabric down onto the substrate. The epoxy should start to wet the fibre bundles. Apply more epoxy on the top surface until the fabric is thoroughly wet out. If there is any extra fabric hanging off the edge of your piece, avoid cutting or grinding by trimming it with a razor knife after the epoxy has partially cured to a rubbery state (towards the end of the gel phase). It is much quicker and a lot less mess to trim the excess before it fully cures as opposed to cutting or grinding the final part.
Re-coating
When the epoxy cures to a tacky state (like masking tape) it's the ideal time to re-coat. Re-coating during this phase creates a chemical bond which means better adhesion and you can avoid sanding. If the surface is hard to the touch, let it cure so when sanded it will produce dust. The ambient temperature and thickness of the epoxy coating will determine when you can sand the surface. Before sanding the epoxy coating, wash it with water and an abrasive pad to remove any amine blush. The blush will feel like a waxy film on the surface of the epoxy coating. This water-soluble byproduct of the curing process should be removed before sanding the surface scrupulously. Once the epoxy coating is sanded, you can apply another coat of epoxy or a UV-stable topcoat.
Understanding these basic epoxy techniques will help you prevent common epoxy problems.
There is lots more expert advice on Wessex Resins' support pages.