Back to basics- Seven Steps to Safer Sailing Navigation
by John Jamieson on 2 Dec 2011
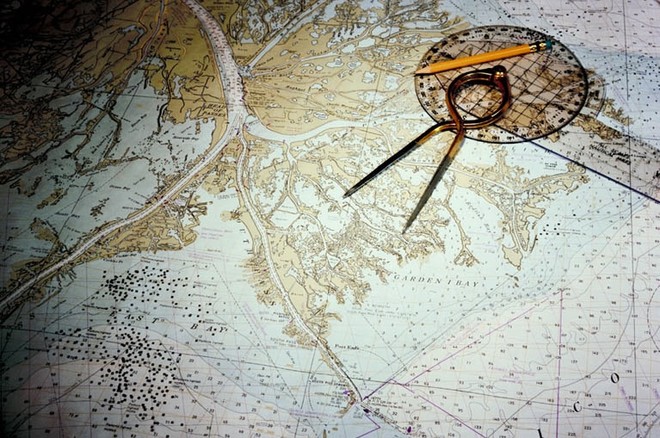
Sailing navigation SW
If you are anything like me, it's easy to forget your sailing navigation basics in exchange for the effortless nautical GPS or chart plotter. But if you want to excel as a sailing skipper, you need to keep a basic navigational chart plot going--just in case a spark blacks out your trusty black boxes!
Brush off those dusty navigation tools and use these super basic techniques to start off on the best foot for safe and sound sailing navigation.
1. Plot Your Latest Nautical GPS Position:.
Plot true courses onto your chart. Use arrow-heads to indicate direction. Label each course line as shown below (step six). Look at the nautical GPS or chart plotter. Enter the time, Latitude, and Longitude into a log book or binder. Plot this position onto the navigational chart.
2. Draw the True Course:
Use a protractor or parallel rules to draw the true course from the latest GPS position. On the compass rose, use the outermost ring and plot true courses. The true ring gives more accuracy, makes plotting easier on the eyes and stomach, and many charts only show true compass roses.
Label the course line with the Magnetic course. Use a magnetic course label, because you are steering the boat with a magnetic compass. To convert from a True course to a Magnetic course, you apply a correction called 'variation' to the True course. Subtract easterly or add westerly variation to the True course. Variation changes as your position changes, so make sure to check the variation often when sailing. Locate variation in one of two ways:
How to Find Variation on Charts Close to Shore:
Look in the center of the closest compass rose to your position. Near the crosshairs, the variation will be labeled with a number and the letters E (or East) or W (or West). Use the closest compass rose to your position.
Just below the crosshairs you will find a note of the annual increase or decrease in variation. Take the difference between the year shown and the current year. Multiply this difference by the minutes of increase or decrease. If increasing, add the difference to variation. If decreasing, subtract the difference. Round your answer to the closest whole degree of variation.
Example:
You find the closest compass rose to your position.
Variation: 18 degrees east (2004)
Annual decrease: 5 minutes
The current year is 2011; what is variation at this location?
7 (years) × 5 = 35 minutes
18 degrees east – 35 minutes = 17 degrees 25 minutes east
Round the answer to the closest whole degree. The variation in this instance is therefore 17 degrees east.
Sometimes the annual change in variation is noted as east or west, rather than increasing or decreasing. If the annual change has the same name (east or west) as the variation, variation is increasing. If the names are opposite, variation is decreasing. For example: If your compass rose says 12°14'W (10'E), this indicates a decrease of ten minutes a year because the names, W and E, are opposite. If it says 12°14'W (10'W), that would indicate an increase by 10 minutes a year because the names are the same.
How to Find Variation on Charts Offshore:
Sail further offshore and compass roses become less frequent. Because of this, you cannot rely on the compass rose on an offshore chart to show variation. Instead, look for diagonal, dashed, magenta colored lines--called 'isogonic lines'--that span the chart. Scan the line to find the variation written somewhere on the line. Use the variation shown on the closest isogonic line to your position.
Next, Find Your Magnetic Course.
Example: You plot a True course of 097 onto your chart. You look in the center of the closest compass rose or isogonic line to your position. You determine variation to be 7 E (East). Subtract easterly variation from True course to find Magnetic course. 097 True - 7E = 090 Magnetic.
To summarize, you plot the course in degrees true; you label the course line in degrees magnetic. Write the course label on top of the course line like this: 090 M (see illustration).
3. Average Sailing Speed Over Ground (SOG)
Under sail, speed can vary with the wind. So, to be effective, you will need to take an average of speed readings from your nautical GPS each hour. Average at least four speed readings. Write the speed label on the bottom of the course line beneath the magnetic label like this: S - 5 (see illustration).
4. Estimate How Far You Will Sail One Hour from Now:
Good sailing navigation means you will take your last position and 'project' it into the future. This method--called 'Dead Reckoning'--has been used for centuries for safety. By estimating where you will be ahead of time, you will have a solid reference to use for comparison to your next GPS position.
For instance, if you are plotting fixes every hour, estimate how far you will sail one hour from now. If your average sailing SOG was five knots, then you would estimate that you would travel five nautical miles over the next hour.
5. Measure your Distance Sailed:
Use dividers or better yet--a compass (this tool has a needle in one leg and a pencil lead in the other). Go to the right or left side of the chart (the Latitude scale). Spread the legs to your measured distance. In our example, we would spread the legs to five minutes of Latitude, which equals five nautical miles.
6. Plot the New Dead Reckoning (DR) Position:
Stick the needle part of the dividers or compass in your last known position (waypoint, light structure, or buoy). Sweep the other end of the dividers or compass over your sailing course. Place a pencil mark where it touches the course.
Plot a DR (dead reckoning) position as a half circle with a dot, ahead of your present position. This shows where you expect to be sometime in the future. Note that your 1200 position dot has been enclosed by a triangle. Some navigators prefer this to clarify the type of fix.
Electronic positions (GPS, radar) are surrounded by a triangle; visual bearing positions (taken with a compass) are surrounded by a full circle. Crystal clear labeling avoids confusion and creates a historical record of your vessel's path over the earth's surface.
7. Label Your DR Position:
Draw a half-circle over the pencil mark. Use just half a circle, because a DR position is a 'best guess'. Label the half circle with the time of the next fix and the abbreviation 'DR'. In our example, we measure 5 nautical miles ahead of the 1200 GPS position, place a dot and half-circle at that spot and label it as '1300 DR'. Now you know your approximate position one hour 'down-the-road'.
The Importance of a Logbook:
Keep a logbook. This should be standard procedure from the moment you get underway for a coastal or offshore passage until the moment you tie up. Keep separate sections for Navigation/Weather and Engineering. Log time, GPS, Visual, or Radar Latitude and Longitude, Course, Speed, plus weather information. Keep a comments section for information on sail changes or personnel situations (illness, injury).
Use the other section of the log book to record diesel engine information. Record hours, RPM, oil pressure, water temperature, fuel gauge readings, fresh water readings, and any engineering casualties or oddities (smoke, oil or fuel leaks).
Start all sailing navigation with a super basic dead reckoning plot like this. Gain the confidence you need for safer sailing--wherever in the world you choose to cruise!
John Jamieson (Captain John) with 25+ years of experience shows you the no-nonsense cruising skills you need beyond sailing school. Visit his website at www.skippertips.com for a free sailing tips newsletter. Become a member for instant access to 425+ articles, instructional videos, newsletters, e-Books, and live discussion forums.
If you want to link to this article then please use this URL: www.sail-world.com/91376