Varnishing- quick tips to keep you on the right path
by Interlux/Sail-World Cruising on 2 May 2014

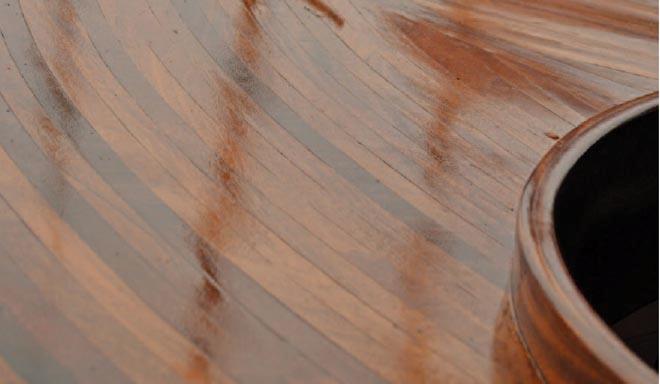
Superb varnish quality - something to aim for SW
Varnishing the brightwork on a boat seems, at first sight, a simple process. After all, you just need the varnish and a brush, right? Well, as many of you have already found out, it's not quite so simple. But with some attention to detail and some sturdy tips to help you on your way, you'll be enjoying your brightwork instead of hating it. Here, Interlux offers some quick tips to keep you on the right path:
Surface Preparation:
It is as important as the final coat and can make the difference between a mediocre and a quality varnish work.
Overall advice:
1. Select your tools and chemicals wisely. Practice on 'test' pieces of wood.
2. Blisters or flaking must be completely scraped and cleaned.
3. Keep plenty of sandpaper on hand in a wide range of grits (50-320). Store in a low humidity area.
4. Round the edges of scrapers with a file to avoid gouging the wood surface.
5. Don’t rush the prep stages. Proper preparation is mandatory to achieve superior finishing results.
Essential Equipment:
Sandpaper: Aluminum Oxide or production sandpaper – grits ranging from 50 – 320
Sanding Block: A piece of 2' x 4' long enough to cover multiple imperfections, yet easy to hold, is suitable
Scrapers: Various sizes with rounded corners to avoid gouging of surface
Tape: To mask off surfaces not to be treated
Lint-Free Cloth: Cheesecloth or commercial tack cloth to eliminate surface residue
Brushes: Various sizes including straight and beveled edges
Dropcloths:To protect large areas
Optional Tools:
Finishing Sanders: Expedites the sanding process, but take care not to use too vigorously as sanders
may damage the wood
Heat Gun: Particularly useful on curved or irregular surfaces to remove old paint and varnish. (Do not use Heat Guns to remove antifouling paint)
Vacuum Cleaner: To efficiently remove residue between sandings and before varnish applications
Sanding:
1. Always sand with the grain.
2. Keep sandpaper clean and change often.
3. Don’t overuse a heat gun. It can be damaging to the wood
and to the glue joints
4. Sand 'By the Numbers' finishing with progressively finer grits of paper.
Cleaning, Filling and Sealing:
If you are varnishing teak...
1. Sand entire surface to be varnished with 80 grit sandpaper.
2. Remove sanding residue from wood by wiping with Solvent Wash 202 or Special Thinner 216 to remove as much surface oil as possible. When sanding varnish, it is best to remove sanding residue with Brushing Liquid 333.
3. The first coat should be thinned 15-20% by volume with the recommended thinner in order to get better penetration into the wood and seal it and establish a foundation for subsequent coats of varnish to adhere to.
4. After an overnight dry, sand with 220 grit sandpaper, then wipe clean with Brushing Liquid 333.
5. Apply additional coats of full-bodied varnish until desired finish is obtained, allowing proper dry times between coats. Sand between coats with 220 grit sandpaper, then wipe clean with appropriate thinner.
Bleaching, Filling and Sealing:
1. Always neutralize and flush the wood surface thoroughly after bleaching.
2. Do not attempt to use bleach as a varnish remover. To remove varnish use Interlux Interstrip 299E.
3. Bleaching may raise the grain of the wood so it is recommended to sand after bleaching.
4. Do Not allow wood filler to dry completely before wiping off excess. Otherwise, it will become almost impossible to remove.
Varnish Preparation:
1. Avoid stirring or shaking varnish.
2. Pour varnish through a filter or through a pair of high-density stockings into a clean container.
3. Don’t use varnish that has set open for a long period of time. It will have picked up dust.
4. Keep surfaces to be varnished as dust free as possible. Use tack rags or vacuum for clean up.
5. Avoid gusty weather and do not varnish wood exposed to direct sunlight.
6. Avoid using varnish direct from the can, this will cause the varnish to age prematurely and may introduce contamination into the can. Pour the amount of varnish that you expect to use at any one time, into a separate container.
7. Never leave bare wood exposed too long, as it will absorb moisture from the atmosphere.
8. Varnishing is best achieved on warm, dry mornings, cold weather retards drying. High humidity or moisture will spoil the gloss.
Brushes:
1. Fine results can be obtained with either natural or synthetic bristle brushes. With proper care, a synthetic bristle brush will greatly outlast a natural bristle brush.
2. On large areas use a foam roller to apply the initial coat followed immediately behind with a wide brush for the finishing strokes, this is best done by two people.
3. Overlap brush strokes.
4. Always use a clean brush that has been kept specifically for varnishing.
5. Clean the brushes before using with Brushing Liquid 333 and then spin dry using a brush spinner.
6. After varnishing clean the brush using low odor mineral spirits. For the final cleaning use Brushing Liquid 333. Then wash the brush in detergent and warm water, spin dry using a brush spinner and wrap in greaseproof paper in a fine chisel shape.
7. For brushes that have not been completely cleaned use Interstrip 399 to soften and clean then switch to Brushing Liquid 333 for a final cleaning.
8. After cleaning hang the brush by its handle to avoid any 'fishtailing' of the bristles.
For fully detailed instructions on how to turn out a fantastic result EVERY time, refer to Interlux's comprehensive instructions. Click here and you will be able to download and print out their very best advice, straight from the experts. (These hot tips above are included, so you won't need to print them both out.)
If you want to link to this article then please use this URL: www.sail-world.com/121716
-202503211220.gif)
