The vital steps to immaculate fibreglass
by Shurhold/Sail-World Cruising on 2 Jan 2012
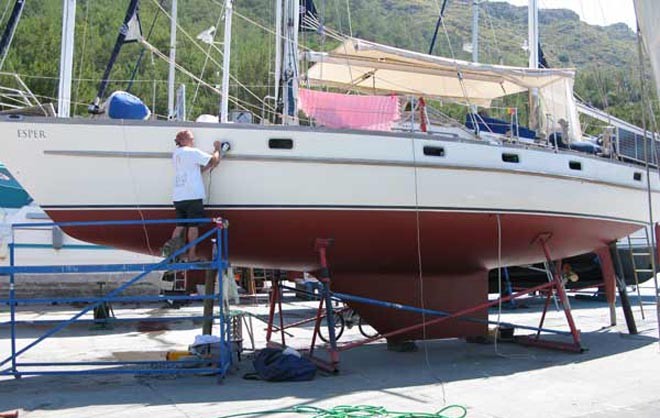
Immaculate fibreglass doesn’t only look good, it protects your boat from deterioration SW
Having immaculate fibreglass not only makes your boat look sexy, it also means that it is protected against the rigours of constant exposure to salt water and salt mist. This article in collaboration with Shurhold first looks at cleaning the glass, then how to buff it effectively and get rid of water spots:
Cleaning Tips:
1. Always rinse down the area to be cleaned prior to washing. This helps remove any loose surface grime preventing you from scrubbing it into the finish.
2. 'Dirty' rain can leave black streaks. Try to wash them off immediately. The sooner you do it, the easier they will be to remove.
3. Less is more when it comes to mixing soap with water. Too much soap will make it hard to rinse leaving soap scum.
4. Wash early or late in the day, avoiding intense sunlight will make it easier to clean because the areas you are working on won’t dry too quickly.
5. To help prevent corrosion on seals, hinges, snaps and zippers, they should be coated with water-resistant lubricant. Care must be exercised when applying liquid or spray lubricants. Some are petroleum-based, and drips or overspray may harm gelcoat or clear coat, upholstery and fabric. (Shurhold offers a handy stick-style lubricant called Snap Stick.)
Next is the buffing waxing and polishing:
Once everything is clean, buff, wax or polish it to make the next cleaning easier. Keep a good coat of wax on all metal hardware to prevent corrosion. You’ll recoup the cost of all the cleaning, polishing and waxing products you use in your investment’s resale value.
Here's how:
You will need removable painter’s tape, a 1-inch paintbrush, microfiber towels, a dual-action polisher, buffing cream, a wool buffing pad, polymer polish/protectant and a foam polishing pad.
Tape off areas such as pinstripes and vinyl lettering.
After that, most boaters will have to buff away oxidation before applying a protective layer of polish. To start this process, a thin coating of buffing cream should be applied over a 2-foot-square area with a 1-inch paintbrush. For the best results, start with a small amount of product and add more if necessary.
Using a dual-action polisher/buffer with a wool buffing pad, move over the work area — first side to side and then top to bottom. This helps ensure all areas are covered and enables you to work quickly and effectively without worrying about swirl marks and surface damage. Buff with light pressure, about 1,800-2,500 opm, until only a minor residue is left. Excess buffing cream can then be removed with a clean, dry microfiber cloth to reveal a deep shine. A slower buffing speed is recommended when working near exposed antennas, lines and horns, to prevent damage.
Once the hull is clean and shiny, it is time to protect it. Surface protectant should be applied to seal the gelcoat and help prevent future oxidation. Polymer-based formulas are easier to use, have a much longer life and guarantee UV protection.
When applying polish, it’s best to use a foam polishing pad and a multispeed, dual-action, random-motion polisher. Applying about a quarter-sized amount to the pad and then smearing it on the surface prior to turning on the polisher works best.
Just like buffing, work in a 2-foot-square area in the same pattern. The polisher should be at a medium-high speed, and the sealer should be worked in until it has almost vanished. Then, excess protectant cream can be removed with a clean, dry microfiber cloth. Now, the vessel will look like it belongs in a showroom.
What about Water Spots?:
After a rain, you may see water spots on the sides and windows of your boat/car/RV. Or worse, you may get stuck with water spots after you give it a good washing! Those spots can be really frustrating when you work hard to take care of your possessions and you want that hard work to show.
What Causes Water Spots?
Water spots occur when water left sitting evaporates, leaving behind any mineral deposits or pollutants to create a slight outline of the spot. Water spots can occur from water from a hose as well as rain. If acid rain is a problem in your area, you may see a different kind of spot, more like a black streak. Hard water also tends to leave more water spots behind than soft water.
Why is it Important to Prevent Water Spots?
Those water spots not only detract from the appearance, but they can damage porous gelcoat/clear coat – leading to a whole lot of work to fix. Consider that after a rain, those mineral deposits may be baked into the gelcoat/clear coat by the sun. You’ll need to buff and wax to remove them if you haven’t taken appropriate preventive measures.
In extreme cases where washing or waxing are not regular tasks, the water spots can build up and soak into the gelcoat/clear coat, requiring a heavy duty rubbing compound or worse, wet sanding to remove them. Water spots on your windows can be even harder to remove than those on the sides.
How to Prevent Water Spots:
Water spots can’t be entirely eliminated, but you can take some easy steps to minimize them:
• Use a filtered hose to reduce pollutants and mineral deposits in the water you use. If you have really hard water in your area, you’ll have an easier time with water spots if you use an inline water softener, too.
• Using a quality soap can help prevent water spots, as they often contain an additive that softens the water.
• Don’t use too much soap and rinse well when washing.
• Dry quickly while washing in smaller areas (don’t let it sun dry).
• Squeegee dry and wipe any still-damp areas with a microfiber cloth or PVA towel to ensure it’s completely dry.
• Wax regularly (frequency is based on many factors). The wax will prevent the deposits from sinking into the surface and make them much easier to remove with regular washing.
How to Remove Water Spots
• The sooner you get to them, the easier they will be to clean. Don’t procrastinate!
• Start Gentle and work your way up to more aggressive cleaners as needed:
• For Black Streaks:
Spot clean with a quick waterless cleaner that won’t strip your wax (like Serious Shine)
Heaver stains use a cleaner wax (like Pro Polish)
For all your needs for taking the best care of your boat, consult www.shurhold.com.
If you want to link to this article then please use this URL: www.sail-world.com/92464